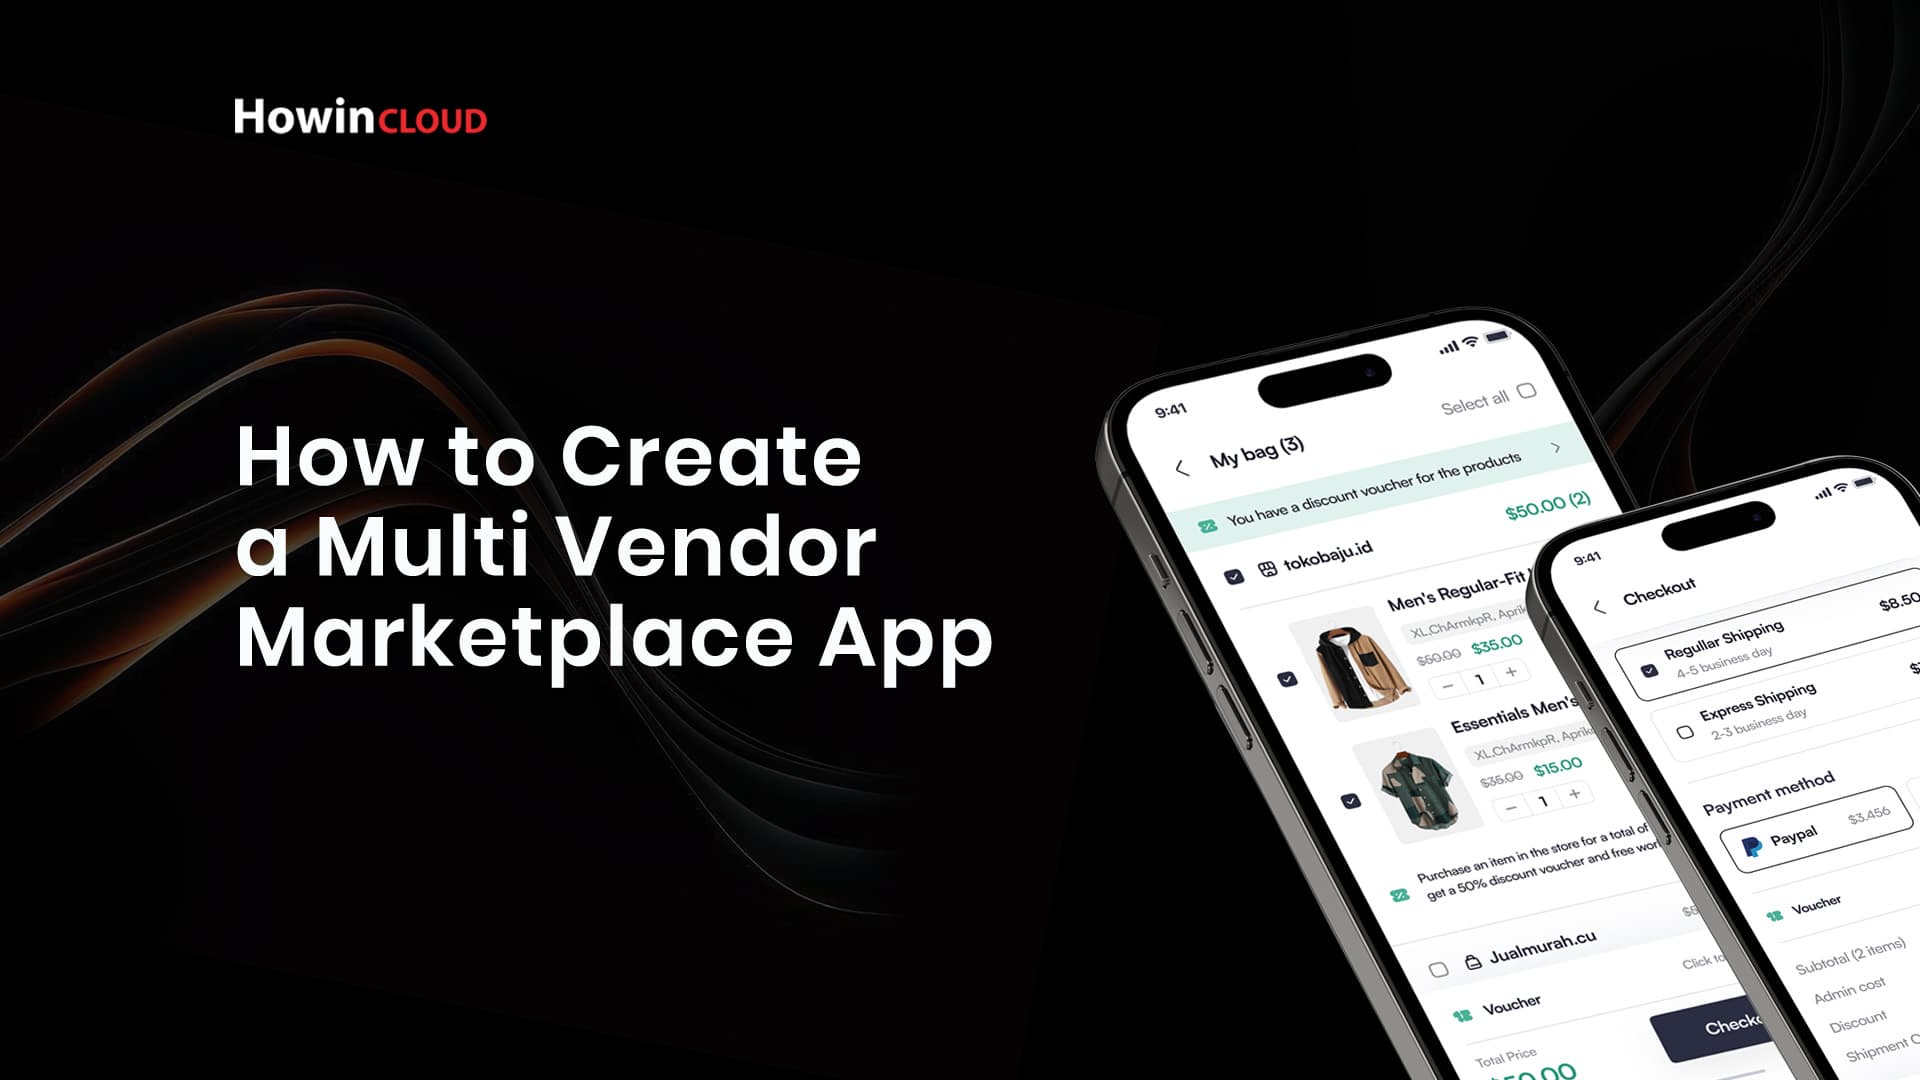
How to Create a Multi-Vendor Marketplace App
Find Your True Space
The eCommerce landscape has evolved dramatically, with multi-vendor marketplaces becoming a cornerstone of online shopping. Platforms like Amazon, eBay, and Etsy have revolutionized how consumers and businesses interact. Creating a multi-vendor marketplace app can be a lucrative venture, but it requires a strategic approach, technical know-how, and a clear understanding of market dynamics. Here’s a comprehensive guide to help you build a successful multi-vendor marketplace app.
1. Understand the Multi-Vendor Marketplace Concept
A multi-vendor marketplace allows multiple sellers to list and sell their products or services through a single platform. The marketplace operator facilitates transactions, often earning revenue through commissions, subscriptions, or listing fees.
Key Features:
• Sellers manage their inventory, pricing, and sales.
• Buyers can browse, compare, and purchase from multiple vendors.
• The platform handles payments, security, and customer service.
2. Research Your Market
Before you start building, research is crucial.
Identify Your Niche:
• General Marketplace: For all types of products (e.g., Amazon).
• Vertical Marketplace: Focus on a specific category like handmade goods (e.g., Etsy) or fashion (e.g., Zalando).
Analyze Competitors:
• Study successful multi-vendor platforms in your chosen niche.
• Identify gaps in their offerings that your app can address.
Understand Your Target Audience:
• Define your buyer personas and vendor profiles.
• Understand their pain points and preferences.
3. Decide on Your Revenue Model
Your app’s profitability depends on a sustainable revenue model. Common options include:
• Commission-Based: A percentage from every sale.
• Subscription-Based: Monthly or yearly fees for sellers.
• Listing Fees: Charges for each product listing.
• Freemium Model: Basic services are free, with paid premium features.
4. Plan Essential Features for Your App
A multi-vendor marketplace app requires features tailored to buyers, sellers, and administrators.
Buyer Features:
• User Registration and Profiles: Simplify the sign-up process with options like email, social media, or phone number.
• Product Search and Filtering: Advanced filters and categories for easier navigation.
• Shopping Cart and Checkout: Seamless, intuitive checkout experience.
• Reviews and Ratings: Trust-building through buyer feedback.
• Multiple Payment Options: Support for credit cards, e-wallets, and UPI.
Seller Features:
• Vendor Dashboard: Real-time sales data, order management, and performance tracking.
• Product Management: Easy listing, pricing, and inventory management tools.
• Payout Options: Integration with payment gateways for vendor payouts.
• Marketing Tools: Promotions, discounts, and ads.
Admin Features:
• User Management: Control over buyer and seller accounts.
• Order Management: Overview and tracking of all transactions.
• Content Moderation: Approving or rejecting product listings.
• Reports and Analytics: Insights into sales, user activity, and revenue.
5. Choose the Right Technology Stack
Your app’s success depends on a robust and scalable technology stack.
Front-End:
• Frameworks: React, Angular, or Vue.js.
• Mobile Platforms: Flutter, React Native, or native development (Swift for iOS, Kotlin for Android).
Back-End:
• Programming Languages: Node.js, Python, Ruby on Rails, or PHP.
• Databases: MySQL, PostgreSQL, or MongoDB.
• Cloud Hosting: AWS, Google Cloud, or Microsoft Azure.
Third-Party Integrations:
• Payment Gateways: Stripe, PayPal, Razorpay.
• Shipping Services: ShipRocket, FedEx, or USPS.
• Communication APIs: Twilio or Firebase.
6. Design a User-Friendly Interface
UI/UX design plays a vital role in retaining users and encouraging sales.
Best Practices:
• Intuitive Navigation: Ensure users can easily find what they need.
• Consistent Design: Maintain a uniform look and feel across the app.
• Mobile Optimization: Prioritize a responsive design for mobile users.
7. Develop and Test Your App
Development Phases:
1. MVP Development: Start with a minimum viable product focusing on core features.
2. Feature Expansion: Gradually add advanced functionalities based on user feedback.
Testing:
• Conduct unit, integration, and system testing.
• Perform usability testing with real users.
8. Launch and Market Your App
Pre-Launch:
• Create a landing page with app details and a sign-up option.
• Use social media, blogs, and email marketing for promotions.
Post-Launch:
• Offer discounts or incentives to attract early adopters.
• Collaborate with influencers in your niche.
9. Monitor Performance and Iterate
After launch, continuous improvement is key.
Track Metrics:
• User engagement, retention rates, and sales.
• Vendor satisfaction and onboarding rates.
Gather Feedback:
• Conduct surveys and read reviews.
• Use analytics to identify pain points.
Implement Updates:
• Roll out new features and fix bugs based on user feedback.
10. Ensure Compliance and Security
• Data Privacy: Comply with regulations like GDPR or CCPA.
• Secure Payments: Use SSL encryption and PCI-DSS-compliant payment gateways.
• Terms and Conditions: Clearly outline user rights and responsibilities.
Conclusion
Building a multi-vendor marketplace app is a challenging but rewarding endeavor. By focusing on research, design, and continuous improvement, you can create a platform that benefits both buyers and sellers while generating substantial revenue. With the right approach and tools, your app can become a leader in the eCommerce space.